

What Image should I use?
There is a saying that “a picture is worth a thousand words”. There is some truth in that but there are some pictures that do and some that are of no purpose at all! So how do you go about getting the right one?
Studies show that listings that include real people are more persuasive than those without. People engage with People. Some examples of this are:
- A person looking at or pointing to a product or text.
- A person carrying out their job or therapy.
- A person in their environment.
- A personal headshot.
As well as your main photo you can add additional photos to the Premium Listing but make the first one count. If a photo can answer the users questions regarding the who, what, where, when, why or how of a product or service, you are using the perfect photo. Only adding one image to your listing is an opportunity missed!
Can I add Google Images?
Definitely not! Most images carry a copywrite and there are external legal consequences if you are found to be using them. Instead – take a few yourself or if you really cannot then try a few free copywrite websites such as Pixabay.com but make sure you adhere to their conditions.
Naming your image
So, now you have the image that you want let’s name it.
Correctly naming your image helps with search engine optimization ie it makes it easier for the browser (like Google) to search for words. Let’s say that you have an image of yourself that you have taken. Chances are it will be called img 2358 or similar by the camera. It is unlikely that a user will search for img 2358 so let’s change that to hypnotist-london or even your-name-hypnotist-london. Now if a user types in hypnotist-london into a browser you have a chance of appearing in the search list.
Choose relevant file names, include keywords (like your product or business name) where you can, separate words with hyphens (makes it easier for search engines like Google to read and understand the content – avoid underscores).
Add an alt text as this assists for disability ie if someone is using a reader then it will read out the name of the image and this makes it clear what it is. When you upload your image you get the opportunity to add this. Use the same description as your photo name. No need to add hyphens just use normal text.
Optimise the File Size of your Image
The optimal size for the Therapy Register website is a minimum of 400 x 400 pixels – I like to use 600 x 600) or close to that. It depends on the shape of the image but as long as you don’t go below those it should give you a nice sharp image on your listing.
If you use a small image – say 200 x 200 then the website will expand that and your image in most cases will look blurred.
To find out the size of your photo – right click on it and go down to properties – from the tabs at the top select Details – at the bottom of those you will see Image and it will give the size of the image.
You can resize your image in Windows 10 using Paint and there are also several free online websites that will do this for you.
Some images to help you with editing
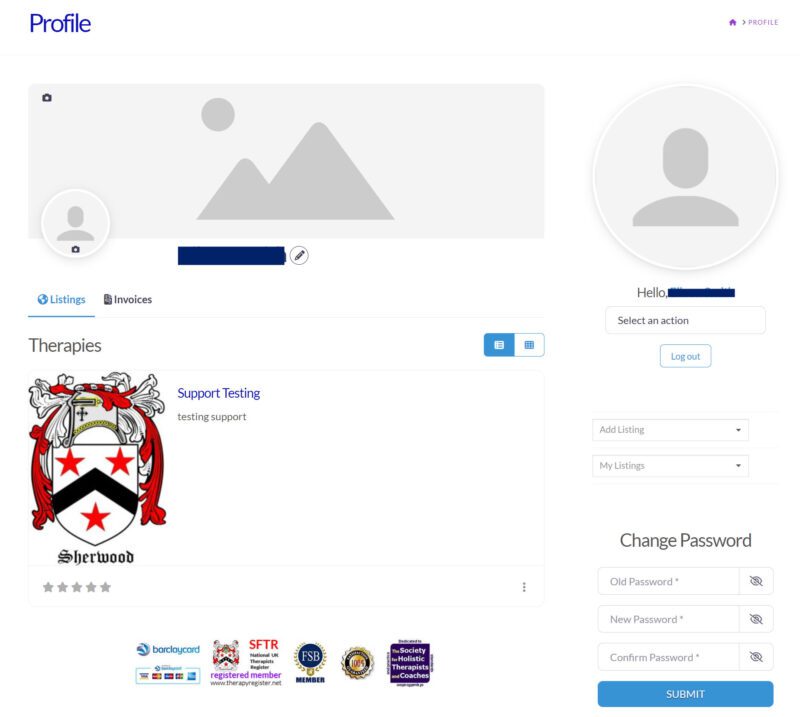
- When you log in to the website you are taken to your profile page.
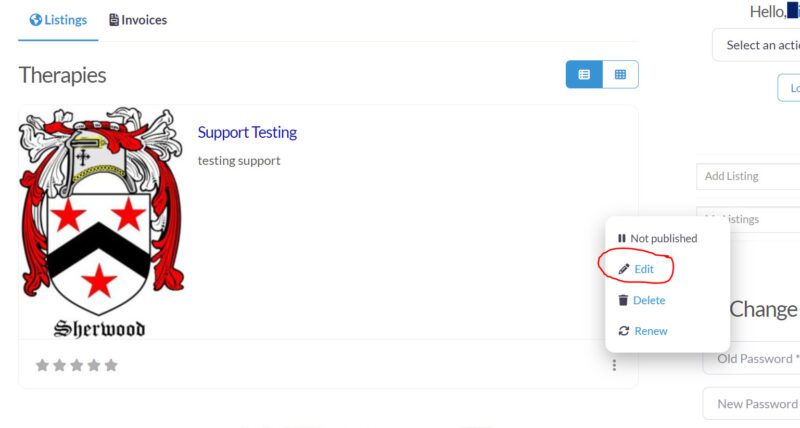
- Your Listing appears under Therapies on the left. To the right of that you will see 3 small dots in a vertical line. Select these dots and it will open a pop up menu where you can select Edit.
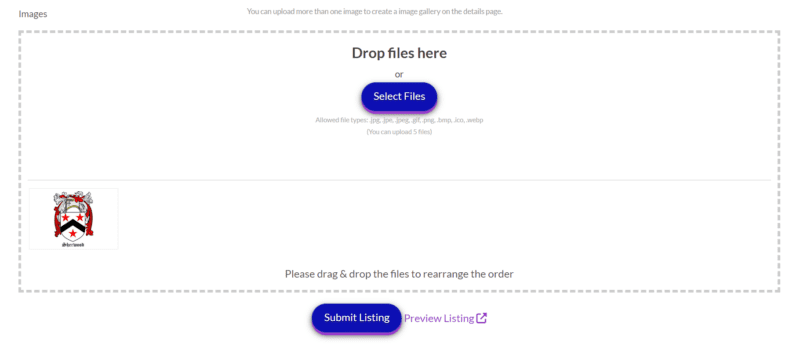
- When you select Edit from the pop up menu, your listing will load up. Scroll down to where it shows your images. You can add and change images here.
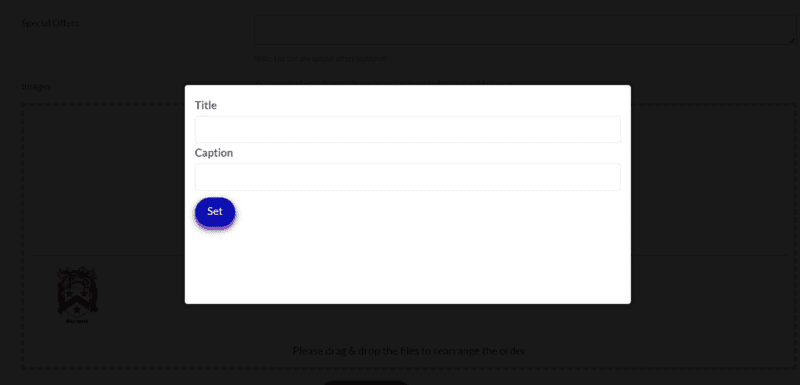
- To add an Alt tag Hover over the image and select Edit then add a Title. This title will become the Alt Tag.
If you have an questions please do not hesitate to contact us using the Support form on the Contacts page of the Website.
Only one thing left to do now and that’s go and check your listing photos and make sure they are working for you !
